Hey Everybody,
So here is my first weathered idol:
This was something that was quick, fun, and simple to do. I simple took the colors of chalk I wanted, scraped them with an xacto knife into a cup, then added windex as my thinner to make the wash, and brushed that over the idol. Once dry it was then sealed with matte sealer through the airbrush.
More of these and more chalk weathering tests to come,
Thanks for following.
18 April 2012
KING OF PROCRASTINATION
Hey Everybody,
I of course don't always get around to updating this blog as much as I would like for various reasons, usually due to my work schedule leaving me zapped of motivation to work on things at the end of the day and then when the weekend rolls around, that time gets spent taking care of all the other stuff that needs to get done. Anyhow, where I am going with this is discussing procrastination, something I am good at lol. It's certainly not that my mind isn't always all over the place with ideas for projects, but as I mentioned before, the motivation to do them doesn't match it.
So along those lines, I finally got around to doing and getting two things I have been meaning to do forever now... Airbrushing and Pigment Weathering.
I have used external mix airbrushes with canned propellant in the past.
Airbrushes such as these are really no different than using a can of spraypaint. They don't have any real control and are only good for basecoating things. The benefit is the fact they allow the use of acrylic paints to be used which is good on certain soft plastics and vinyls to which enamel paints would have a reaction to and stay tacky forever. As I mentioned, when I have used them in the past I used canned propellant which has it's own issues such as having to keep it the right temperature to maintain pressure, etc. So having gotten tired of doing that, two years ago I thought I would try my hand at using a proper dual action internal mix airbrush running off a compressor.
So at that time after watching and reading several reviews on beginning airbrushing, I purchased a Master Series G23 Dual Action. This is a relatively inexpensive airbrush that works well and matches many features of more expensive ones. However, back to procrastinating, it wasn't until recently that I actually got around to getting the damn compressor to use the thing...lol. So having gotten the compressor in the mail yesterday I have begun to actually learn to use the brush. So stay tuned for what will come of that.
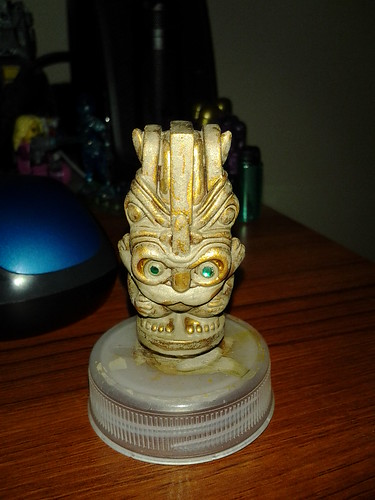
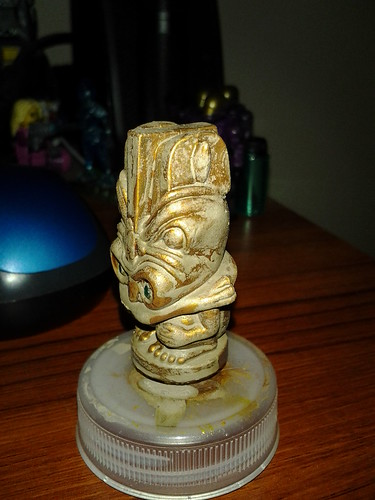
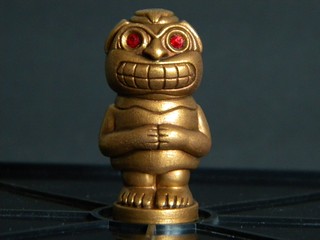
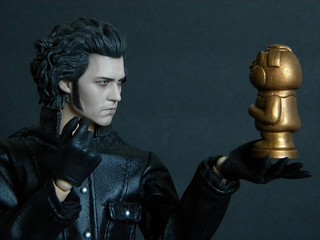
The other thing I mentioned is weathering with pigments. Basically pigment weathering is talking chalk powders and dusting them onto an item or mixing them with water or rubbing alcohol to create a wash which you then paint an item with and once dry it leaves a dirty appearance. Again, this was something I have known about and been meaning to try for ages, but only finally got around to it (also having bought a set of chalks for it like 2 years ago). My main use for this starting out is with my idols:
Whilst in B movies the elements and time don't affect artifacts, I have wanted to use the pigment washes to make them look less "museum" quality, so I'll have pictures of how that has come out.
So more to come on these two topics soon.
Thanks for following.
14 April 2012
MAD SCIENTIST AT WORK
Hey Everybody,
It's been a hectic start to the new year, just been very busy with many things, but I have been working on stuff in the background. So after a bit of an absence I finally have at least a small update of some things.
So, what couple new things have I been up to? Well, one of the things I have been up to is a Mad Scientist... I wasn't referring to myself...
So, who better for a mad scientist than Johnny Depp in classic Burtonesque styling? I have been wanting to make a mad scientist for some time now, but couldn't find the right headsculpt until now. I recently picked up the wonderfully emotive Hot Toys Sweeney Todd headsculpt for a good price and thought it would be perfect. The only repaint I did to it was mixing up some paint to match the hair and painting over the white streak through it, beyond that, I didn't think the head needed any other work. He is mounted on a Hot Toys Slim Truetype. I dressed him in a Sideshow Toy Buffy The Vampire Slayer "The Master" leather coat, black pants by Hasbro, and boots from the Hot Toys Watchmen Comedian. To finish him off I am using a set of very expressive hands from a Hot Toys Batman. His arcade style remote control for some questionable experiment (or perhaps he is just relaxing and playing video game) is from the Hot Toys "Friend" figure.
Now all he needs is some large laboratory equipment.
Thanks for following,
Subscribe to:
Posts (Atom)