29 October 2011

UPDATE: APARTMENT PROJECT

Hey Everybody,

Time for the next update. So last time we saw the loft having a new bed, and now it has new windows. I found the perfect acrylic sheeting to use for the windows that kept in line with the image I had of a warehouse loft apartment.


2011-10-28 10.20.41

2011-10-28 10.20.52

This is fluorescent lighting fixture acrylic. I picked this 4' x 3' foot sheet up for $12. It is nice to work with. Just measure, score with a knife, and snap.

2011-10-28 10.42.51

Then I simply took an enamel paint pen and painted the lines between the panes and inserted them into the picture frames I am using for the window frames.

2011-10-28 11.08.21

2011-10-28 12.28.03

2011-10-28 12.27.30

So the windows are now done. Next up is starting to make the place look more lived in and get rid of some of that empty space. The bedroom needs a nightstand, some art on the walls, and more stuff on the bookshelf.

More to come... Thanks for following.

25 October 2011

UPDATE: APARTMENT PROJECT

Hey Everybody,

Time for another update on the apartment project. I last left off with the room built and some test snaps of an older bed in the picture for scale.

2011-10-24 13.22.14

Well that old bed was a little too rustic for the style I was going for so I wanted something more modern. Since the idea of a wooden tray worked well for the rustic styled bed, I figured it would work well for a modern one too, I just needed to find the right piece.

2011-10-24 13.22.04

2011-10-24 13.22.37

2011-10-24 13.22.23

So at my local A.C. Moore crafts I found an unfinished 10" x 13" wooden tray that I picked up for $5. I grabbed my sanding sponge to sand it down and set to painting it, just a simple black with gloss sealer to match a shelving unit I had for the room already.

2011-10-25 10.17.21

2011-10-25 10.17.07

Next step was the mattress. I just purchased a 2" thick polyfill pad from Walmart and cut it to size.

2011-10-25 10.19.25

Then grabbed some blue satin fabric I had left over from a set of pillows a friend did for me a while back for the old bed. I took the satin, folded it over the polyfill mattress and pinned it. Then put the whole thing into the frame and tucked it tight.

2011-10-25 10.27.48

Once that was together I grabbed the pillows, set the bed in the room on top of a nice fabric table placemat I picked up that makes a nice area rug, and snapped some pics.

2011-10-25 12.41.25

2011-10-25 12.44.19

Next up is to work on the nightstand, windows, and finally some artwork for the walls.

Stay Tuned and thanks for following.

10 October 2011

UPDATE: APARTMENT PROJECT

OK, so I have some updates for the apartment, well the bedroom so far at least.

So I left off last post with the basic 4 walls of the room. During this past week I have added the window frames and done the one wall in brick as my design was planned. Some interesting things to note along the way though.

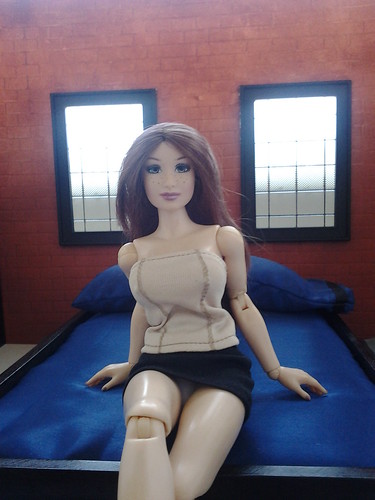
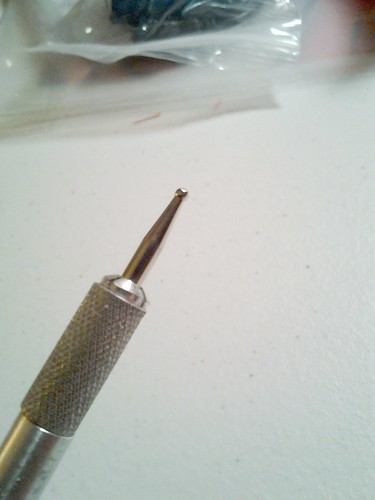
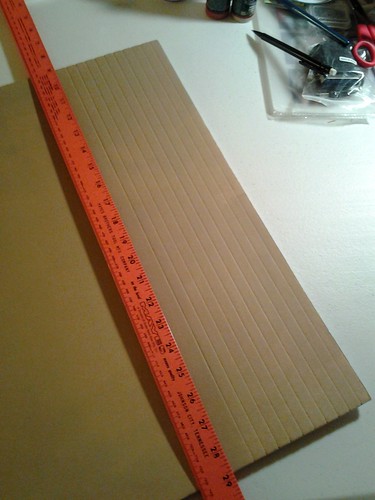
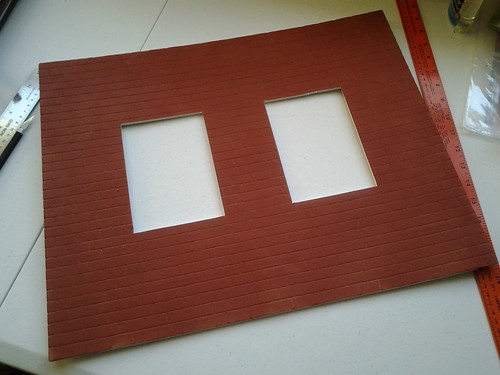
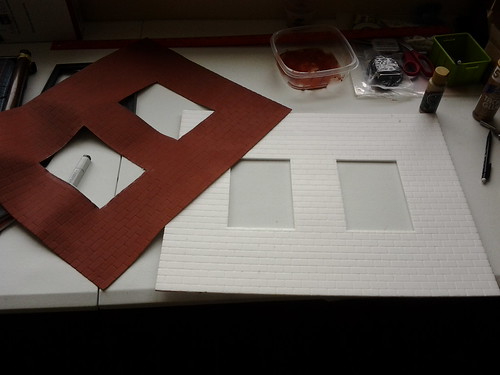
As I said, part of the design for the apartment had one of the walls as red brick, so I wanted to stick with that. I started by thinning down some acrylic tan paint to paint the foamboard. I found that from a test piece, that when painted, the acrylic impregnated the paper and made it take the scoring better without causing as much tearing as it would have on the bare paper. I then took my burnishing tool and after measuring out the 1/2" increments on the foamboard I used my ruler to scribe the brickwork into the board.

2011-10-09 21.24.25

2011-10-09 21.24.41

2011-10-09 22.31.50

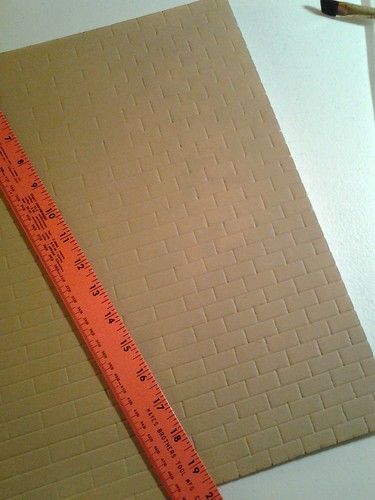
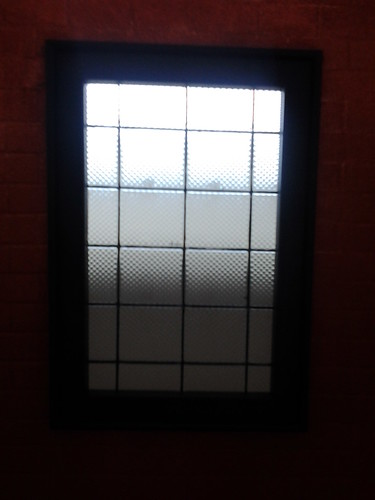
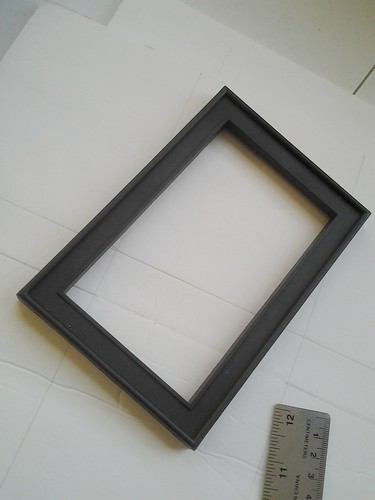
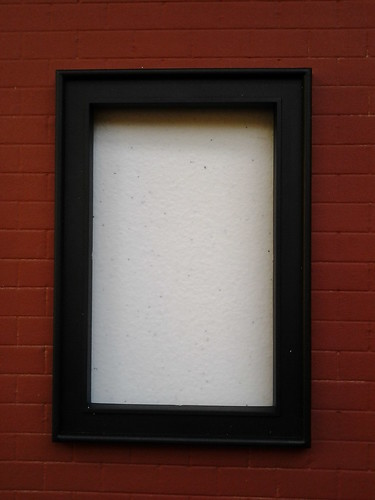
My original plan was to use a tan undercoat as the mortar, then drybrush / roller paint the red for the bricks. However it didn't look as good as planned after. So once all the brickwork was done, I just painted over the entire piece with the red I planned on using for the bricks. Once that was dry, it was time for the window frames. I found some nice plastic dollar store picture frames that I thought would work nicely.

2011-10-10 08.00.15

So I measured my holes for the frames and cut them out. Then test fit the frames in place.

2011-10-10 08.04.53

2011-10-10 08.07.10

2011-10-10 08.07.21

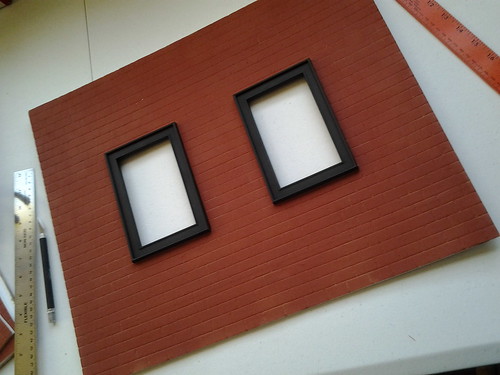
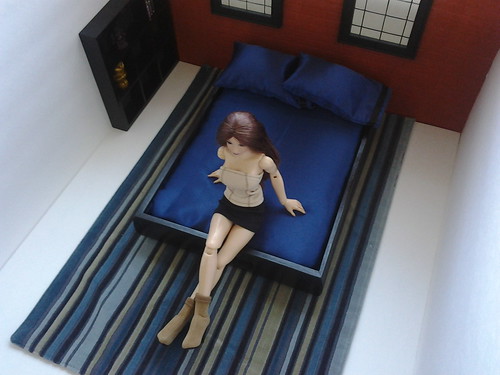
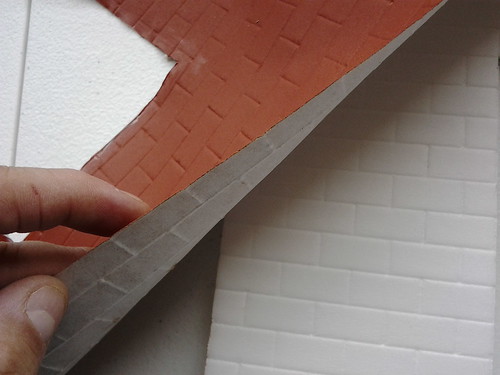
Now, I had mentioned that there was something interesting of note during this project. Now that would be what happened after the window fitting. It would appear that the edged of the paper started to come loose. So I peeled it back some and was going to glue it down again, only to find that the entire paper covering peeled off with ease. So, I peeled it all off... in one whole sheet to expose the foam underneath, which still had the perfect brick pattern on it. I guess the thinned paint as well as the scoring loosened the paper adhesive.

2011-10-10 10.32.35

2011-10-10 10.32.12

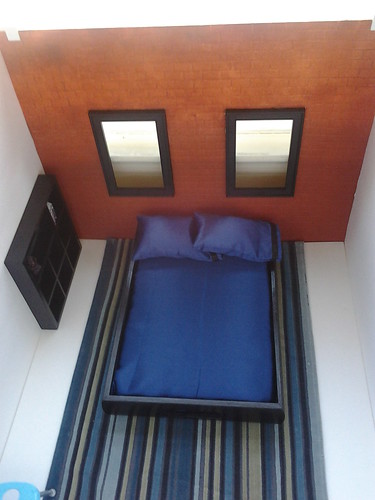
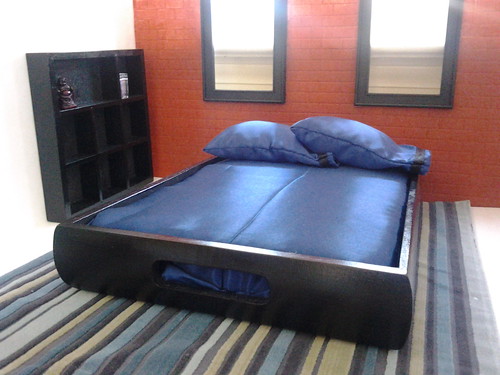
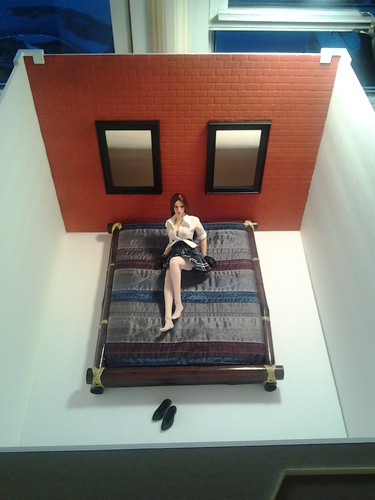
So, I simply went with it and repainted the foam with the red paint once more, and proceeded to glue the windows in place. Once the windows were dry I then got my foamboard clips and pins, fit the walls together, inserted the floor, then placed an old bed in there for scale, and set Gillian in her bedroom to inspect the construction so far.

2011-10-10 18.26.25

So the next steps to work on will be the doors and windows... stay tuned...

Thanks for following.